Perforated Window Decals
Select One of the Following
No results found for "{{previous_search_keyword}}"
Get it Professionally Designed
Tell us what you want your product to look like and our team of professional designers will bring your vision to life!
And the best part: All design fees will be fully credited to your product purchase!
 162K
162K
Store Ratings
Why Signs.com?

What Are Perforated Window Decals?
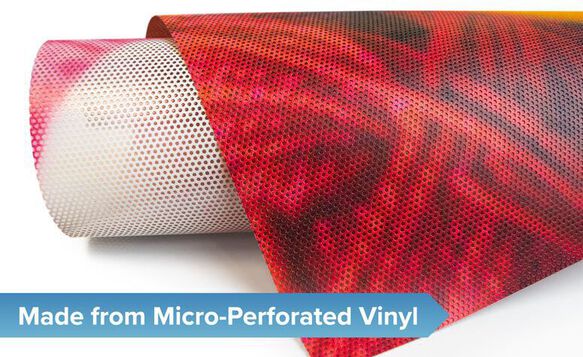
A perforated window decal is an image or graphic printed directly onto perforated, adhesive vinyl material. These decals feature one-way vision, allowing you to see outside the window inside your store but not from the out-side looking in. This is possible by puncturing 50% of the vinyl material with tiny holes called micropunctures. These micropunctures are small enough for the decal to maintain a high-quality image on one side yet be see-through on the other.
These decals are designed for indoor and outdoor use. The most common uses include business/storefront advertising, window decor, product promotion, window signage, and branding. Mainly used to cover entire windows, they also deflect sunlight and provide shade and privacy.
Perforated Window Decal Features

-
Easy to Install:
No professional installation required. Install your decal in minutes using our step-by-step installation instructions provided with every order.
![Clear Vehicle Decal Checklist Icon]()
-
Vibrant/High Quality Colors:
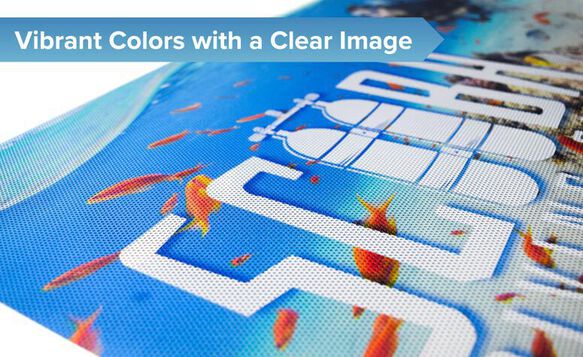
Your image or graphic will be printed onto perforated vinyl using world-class printers with an advanced four-color process, ensuring that your decal will have the most vibrant and clear colors possible.
![Clear Vehicle Decal - Indoor Outdoor Icon]()
-
Adheres to Outside of Window:
Placing your perforated window decal on the outside of the window allows maximum visibility, preventing the decal from being covered up by window glare or tint.
![Weatherproof Icon]()
-
50/50 Micro-perforated pattern:
50% of your decal will consist of solid vinyl material, and the other 50% will consist of micro punctures. This allows one side of the graphic to appear opaque and the other side to appear see-through.
![Transparent Icon]()
-
Weatherproof and Waterproof
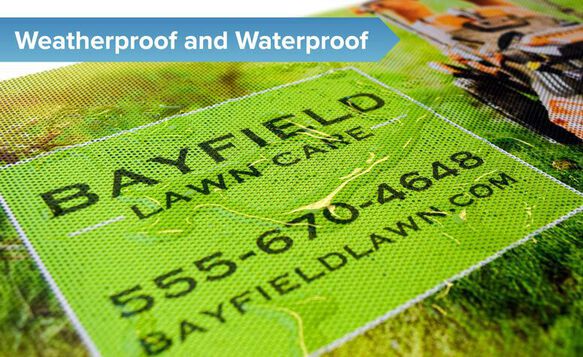
Perfect for outdoor use, your perforated window sign is made with durable vinyl and will withstand rain, sun, and other elements; it has a lifespan of 3+ years. The optional laminate provides extra protection against exposure.
![CutLines Icon]()
Additional Specs
-
Weight
.09lbs per square foot (about the weight of 9 quarters)
-
Thickness
.016" (about the thickness of 4 sheets of copy paper)
-
Details
Perforated, long lasting, good privacy, easy installation and removal
-
Uses
Indoor/Outdoor. Retail, home, storefront, or office windows
-
Print Method
Four color process, eco-friendly, weather, fade and abrasion resistant UV ink
-
Estimated Lifespan
3+ years with proper placement and care
Easy to Use
Design Tool

Create your custom perforated window decal with the easiest and simplest design tool in the signage industry. Upload images, create objects, add text, adjust sizing, change color, and so much more!
Check It Out
Free Professional
Design Services

Whether you need help uploading your design or are interested in creating something entirely new, our team of professional graphic designers is here to help. Nothing beats free!
Learn MoreSimple Installation with No Professional Help Required
The following installation instructions will help you with a quick and easy installation of your perforated window decal. Instructions will also be included with your order, and you are free to refer to this page or download a PDF of the instructions for assistance. If you are installing a large decal we recommend having at least one other person assist you.

Clean your window, removing all dirt and grime from the surface.

Lay out your decal on the window with the backing still on and make sure it is aligned properly.

Make markings on the window with a washable marker. Be sure to double check your alignment to make sure the perforated window decal is where you want it to be.

Pull the graphic away from the window and remove the backing, exposing the black adhesive side of the decal. If the backing appears to be tearing when removing it, this may be because you are not removing all layers of the backing. When removing the backing, you should be able to see the back of the decal, which is black.

Align your decal to the markings made previously and begin to apply to the window. This will be a dry install, so do not use any water on the application surface or the adhesive side of the decal. Use a squeegee* or flat edge when applying, starting from the center and working your way outward towards the corner of the decal.
*Available for purchase with perforated window decal

Once you have applied the entire perforated decal to your window, remove the excess material around the edges using a razor blade.
Download or Print Perforated Window Decal Installation Instructions PDF
.jpg)
Care
If possible, hand wash your custom decals with a damp cloth, avoiding pressure washers that can cause peeling. To remove, gently peel from the top down, then remove any leftover adhesive with soapy water or adhesive remover and a razor blade.
Selecting the Best Size and Design for Your Decal
1. If you are wanting to cover an entire window with your perforated window decal start by measuring the largest width and height to ensure your graphic will cover all areas of the window.

2. Order your graphic 1” wider than the width of your window and 1” higher than the height of your window to allow room for trimming. For example, if your window is 50” x 20” order a 51” x 21” decal.

3. When designing your custom decal, place your design/image/graphic in the center of the decal to make sure no part of the main design will be cut off when trimming.


4. To maximize the visibility of your decal, be sure to use a high contrast between backgrounds and lettering, objects, and images in your design. Generally speaking, dark lettering/objects/images with a light background installed on a dark surface tend to work best. Please note that your decal may appear washed out or allow two way visibility if it is dark outside and the lights are on inside.


-6709.png)
One-Way Vision
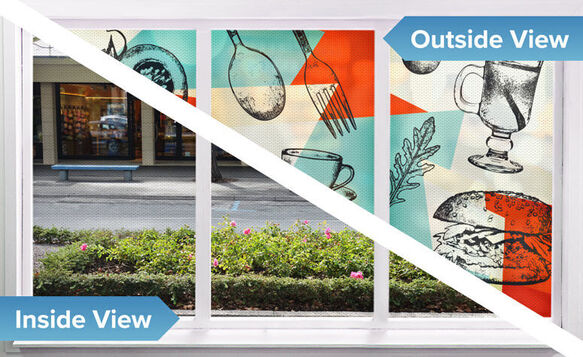
The most unique feature of perforated window decals and signs is their ability to provide one-way vision. The micropunctures in the material allow a vibrant image or graphic to be displayed on the outside of the window yet allow you to see through the decal from the inside. This is great for advertising promotions, sales, and products all while maintaining privacy and shade from the sun. Please note that the one-way vision of perforated decals can be negated when the interior setting is brighter than the exterior setting such as a well-lit store at nighttime. This is true of any perforated or one-way vision decal.

Piece Multiple Decals Together to Create Stunning, Large Displays

1. Measure Your Full Window
Measure the full size (height and width) of your windows in inches. Do not include in your calculations the rubber and/or metal on the outside edges of the window. i.e. the exterior or outermost rubber/metal of the entire window.

2. Measure Each Window Individually
Measure the full size (height and width) of each window in inches. Do not include in your calculations the rubber and/or metal by the glass panes of the window. i.e. the interior rubber/metal panes of the windows.

3. Fill Out Free Design Services Form
Fill out the form on our Free Design Services page, providing the measurements of your windows and a file or idea of the image/graphic you would like to use. You will then be contacted by one of our professional graphic designers within 24 hours, who will work with you personally for free to get you exactly what you need for your new multi-panel window display.
Popular Perforated Window Decal Templates
Ordering custom window decals starts with your design. At Signs.com you can upload your original perforated window decals artwork and we’ll print them on high-quality vinyl to decorate your storefront window. We also offer a selection of customizable templates you can use as the basis for your window decal. Simply choose among our popular design templates, modify them to your liking, and hit send so we could start the printing.
How to Use the Perforated Window Decals Templates
- Click on the image template of your choice above, you’ll then go to our online design tool where you can modify the design further.
- Add your business name and other information you want displayed on your decal (such as opening hours, taglines, USPs, and contact information). You can also modify the colors, fonts, and images on the template.
- If you are satisfied with your design, hit “Save and Continue” and you’ll be redirected to our payments page. Proceed with the payment and if everything checks out, then it’s off to the printers!
All Window Decals
Questions and Answers
The estimated lifespan of our perforated window decals is 5+ years with proper installation and maintenance. The lifespan can vary quite a bit depending on the situation and usage. The laminate option provides some extra protection against exposure.
Perforated decals placed on interior windows like an office setting can easily last 5+ years. Decals used on the exterior of a storefront that is located in a harsh climate may last anywhere from 3-5 years.
Further, decals that are damaged when washing the windows or even peeled away by passersby will obviously not last as long as one that is simply installed and not touched again.
The actual printing should last the duration of the decal as we print with UV ink that is also fade and abrasion resistant.
As noted above the constant exposure to the elements can reduce the lifespan of your perforated decal. Nonetheless, even in the harshest of climates we’ve typically seen the decals last several years. The optional laminate for window decals has a gloss finish and provides extra durability and protection for your printed design.
Perforated decals are typically not used for vinyl lettering or individually cut letters. If you are interested in this type of window decal please visit our vinyl lettering product page.
Perforated window decals can technically be either cut custom with border (previously known as or sometimes referred to as halo cut) or custom cut (previously known as contour cut). "Custom With Border" means that your decal would be cut to shape with a small border left around the perimeter of the decal. "Custom" is the exact same thing but will not retain a small border.
While these cut-to-shape choices are technically possible to do, they aren’t typically necessary. The vast majority of those ordering perforated window decals simply fill the entire window with the decal and rely on the micropunctures for transparency. If you are still interested in a cut to shape perforated window decal you may do so by selecting one of our shape options.
Yes! you can choose to design your perforated window decal with 1/4" rounded corners or 1" rounded corners.
In addition to the custom shape options available, you can also chose to have your perforated window decal cut to the shape a square/rectangle or circle/oval. All of these options can be found in the design tool. Please contact us at support@signs.com or call us 888-222-4929 if you have any questions about the various cut options you have for your winodw decal!
Our printers are large format printers that are capable of printing billboards and even signs much larger than that. While this means that we are able to print fairly big signs it also limits how small we can print our signs. Big printers trying to print incredibly small window decals simply do not result in a good looking decal. The minimum and maximum sizes of our perforated window decals are listed below. If your specifications fall outside these areas please contact us and we’ll see if there is any way to get you your decal printed at the size required.
The minimum size of our perforated window decals is 6”x6”.
The maximum size of our perforated window decals is 53”x11998”. :) In other words, assuming at least one of your dimensions is under 53” then we can print your decal!
All of our signs, including our custom perforated window decals, are printed in full color. Thus, whether you want 1 color or 100 your design, it will not impact the cost of your decal! We even offer free design services. Keep this in mind as your price shopping for window decals and always ask the sign company whether they print in full color or not.
Yes. If your window is perpendicular to the ground, you should have no issue seeing through the perforated decal. However, if the window is at a steep angle, you may have trouble seeing through the perforated decal. The ‘steeper’ the window, the more difficult it will be to see through the decal.


 Fastest Growing Private Companies in America
.jpg)


.jpg)

.jpg)


.jpg)


